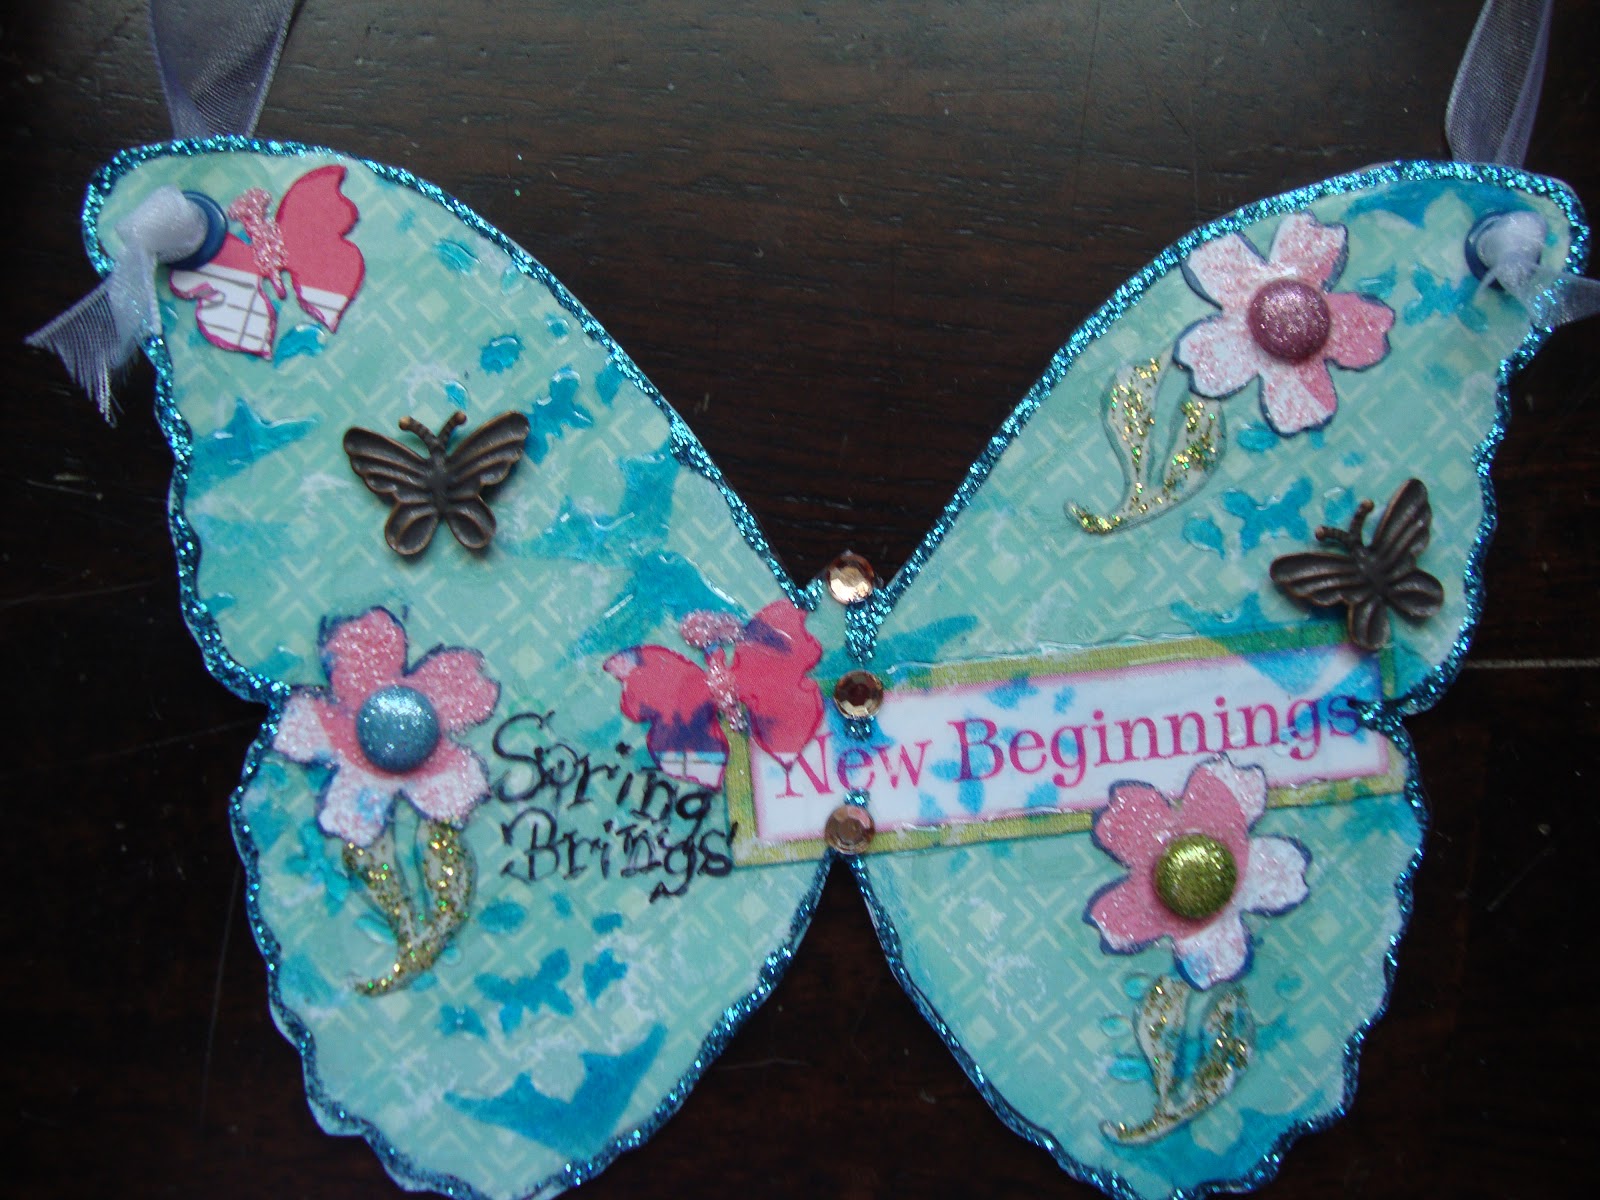
I wanted to do something different and had done a technique similar to this in a class MANY years ago so I thought I’d play around. I’m truly branching out of my box on this one! First I took a pre-made chipboard butterfly and painted it with Ranger paint dauber on both sides.
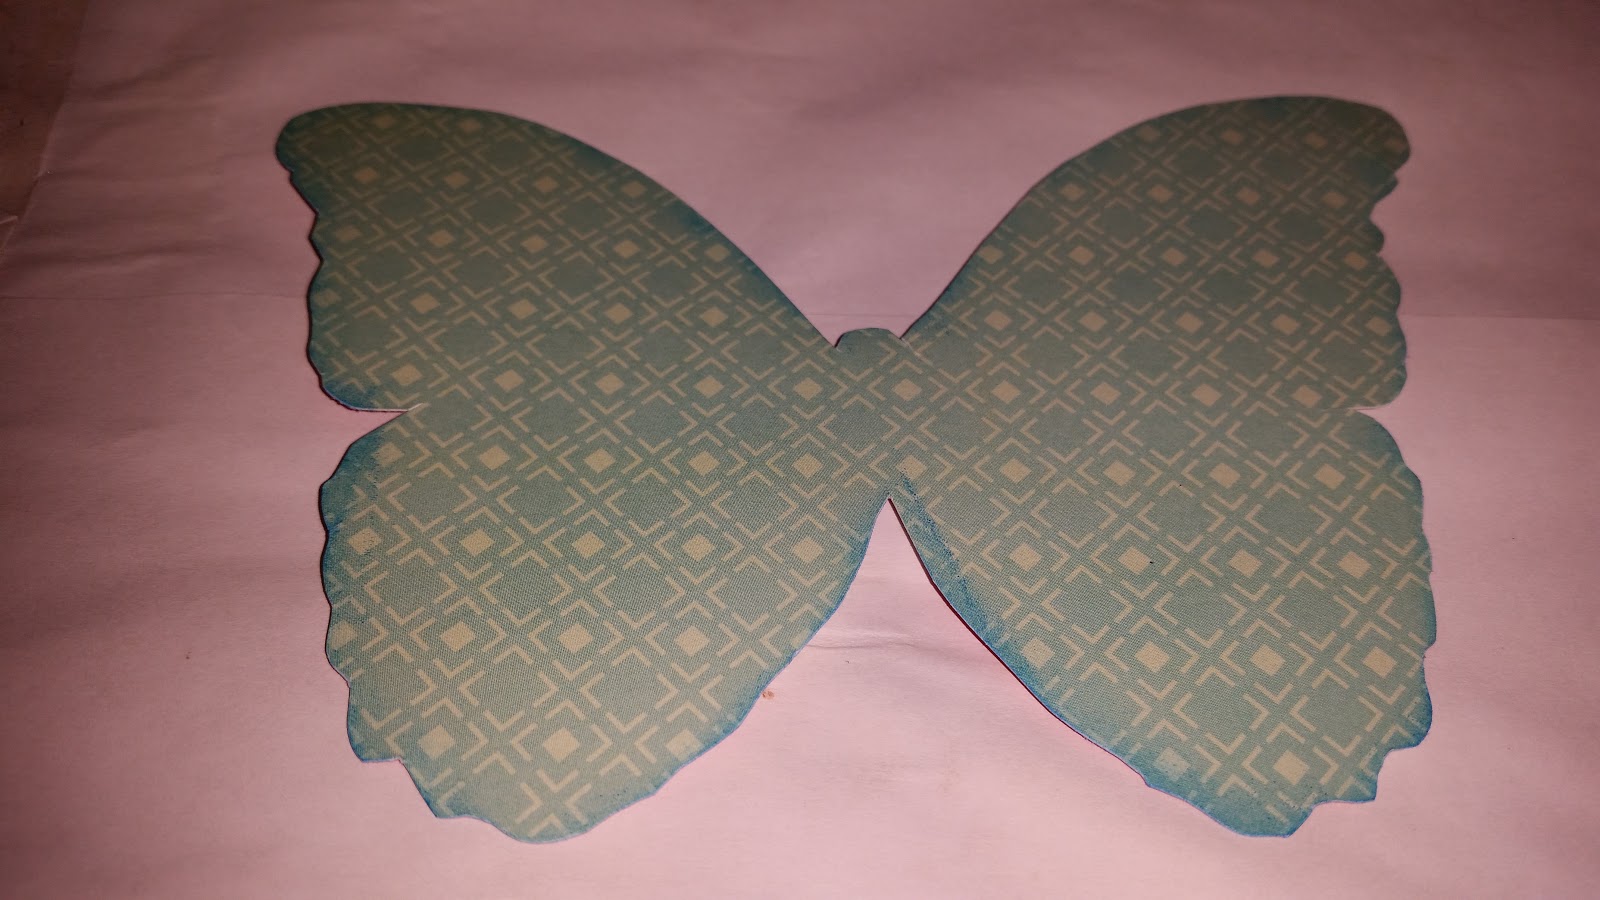
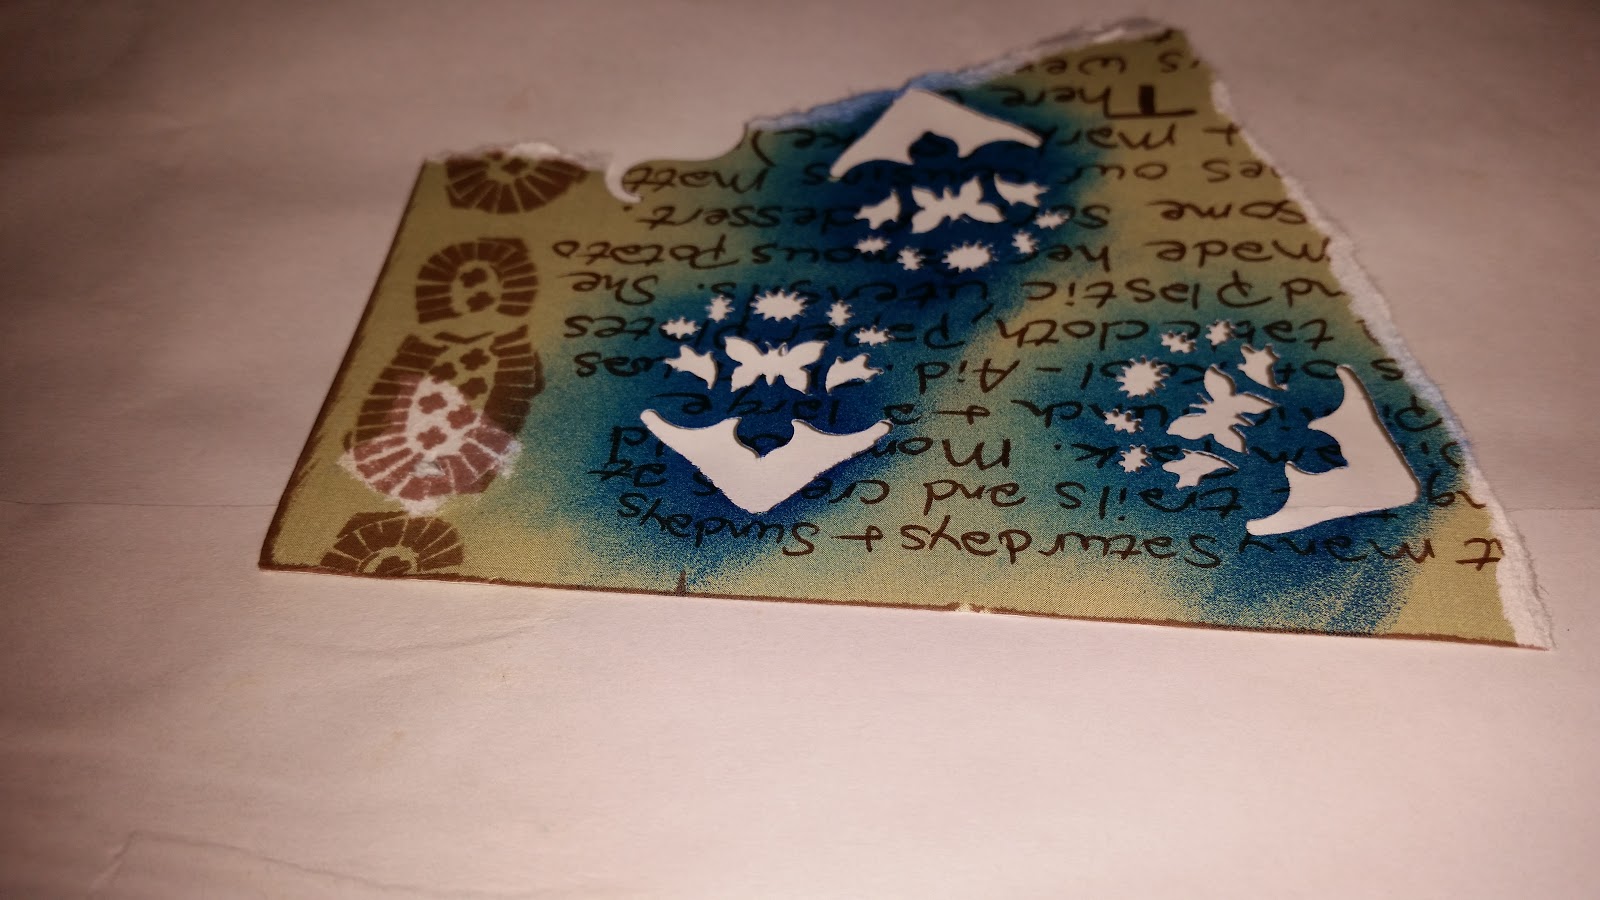
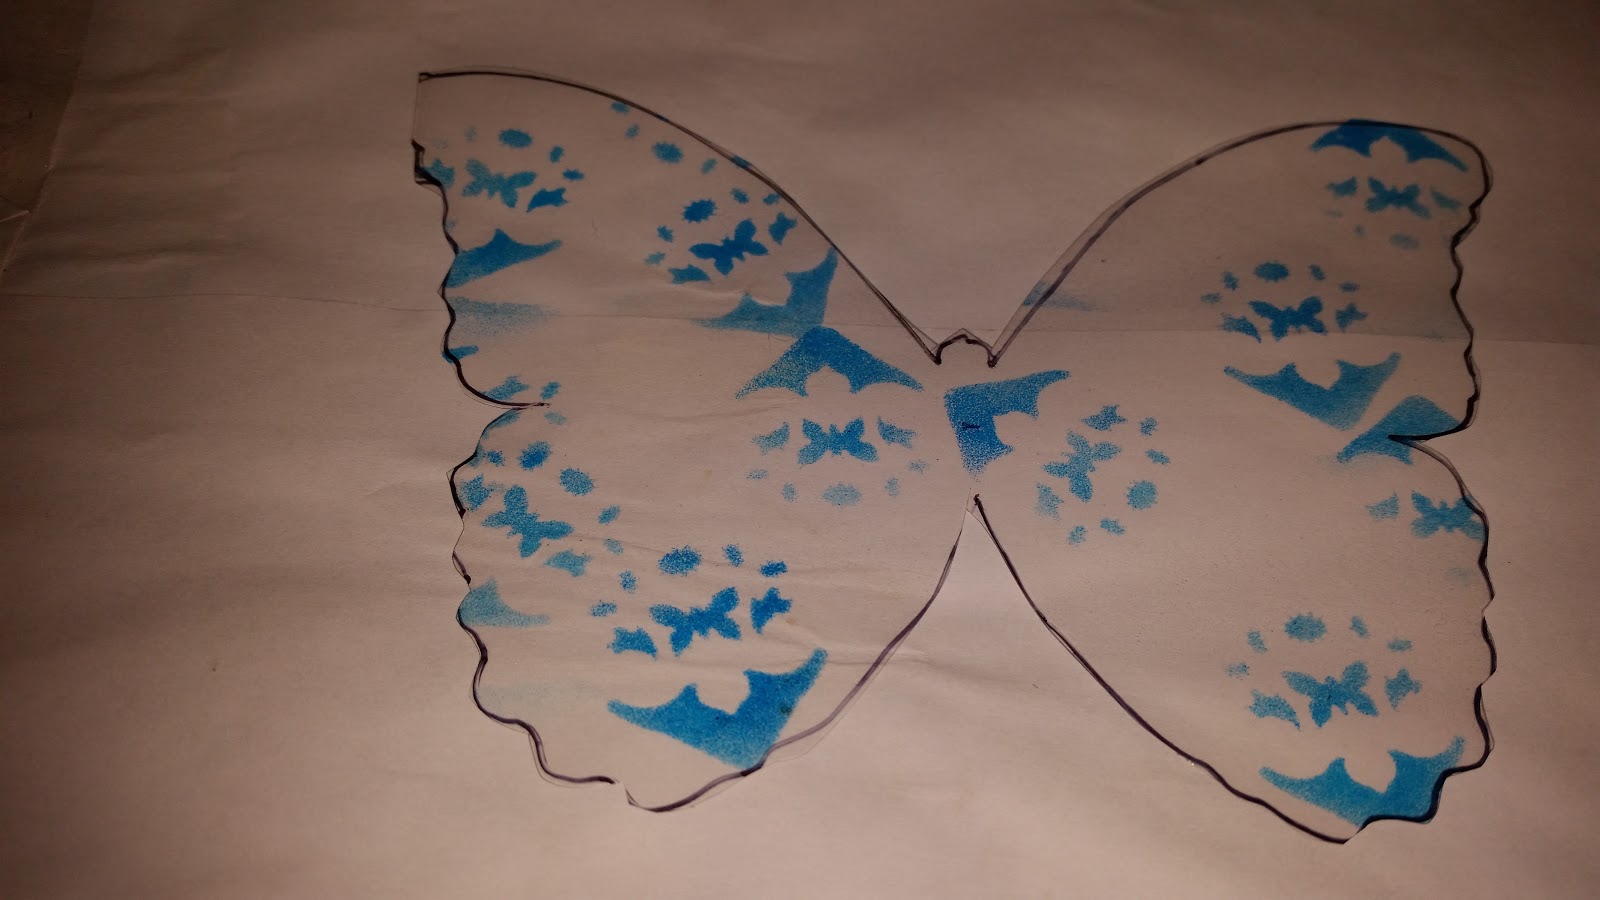
Then I cut out a piece of patterned paper and a piece of clear transparency to the shape of the chipboard. I covered the painted chipboard with Mod Podge and then added the patterned paper on top of that. While that dried, I took Kreaxions Punch #901 and punched it 3 times in a pattern on a piece of scrap paper. Then I used a foam dauber, the “template” created by the punching and some Azure Staz-On ink and made a pattern on the BACK side of the transparency.
I cut 3 flowers from Kreaxions Punch #603 (out of stock in the Just Imagine Store right now) and 3 stems from Kreaxions Punch #602, as well as 2 butterflies from Kreaxions Punch #604. I outlined my punched pieces with matching pens and using my Xyron X to add adhesive, I attached some to the chipboard piece and others to the transparency piece. I mixed stems under and over to give it more texture and interest. The sentiment sticker is under the transparency. Once I had them arranged where I wanted them, I used Crystal Lacquer to adhere the transparency to the chipboard. I made sure I spread out the Crystal Lacquer so that it wouldn’t show. After it dried, I cut away any excess pieces from the edges. Then I started embellishing it with Stickles, bling and sparkly brads that I cut the backs off of. I used Crystal Lacquer to attach them and to enhance some of my elements. After the top was dry, I punched holes in the top corners of the wings and added an eyelet on each side to make it prettier. Then I tied a piece of big ribbon so that it could be hung on a door handle or a wall or whatever! I did paint the back with the Ranger dauber but I chose not to decorate it. Finally, I added some Stickles around the outer edges to give it more interest and definition. Here’s the final product once more…
Other Materials – Chipboard Butterfly – Unknown; Patterned Papers – Fancy Pants; Transparency – Office Depot; Ink – Staz-On; Pen – Sharpie; Stickles – Ranger; Metallic Butterflies – Momenta; Brads – My Mind’s Eye; Sticker – Bo Bunny
Want to win an amazing Kreaxions punch??? Well, just go to my blog at http://ginniscrappyworld.blogspot.com and leave a comment. Each time you comment on a post for the month of March you will get an entry to win. On March 3rd I will reveal the winner by using Random.Org. The prize is a punch of your choice from the Just Imagine/Kreaxions store! So be sure to stop by and maybe you’ll be the winner!
Charity Hotrum
Great project! Love all the color additions.
Louise
beautiful butterfly!
Colleen
Great way to use the punch Ginni.
Ange
This is SO pretty! Love how you used the punch as a stencil.
Joan B.
Great idea using the punch to make a stencil!